Seamless FareHarbor and WaiverForever Integration Through Zapier
Elevate Your Business: Seamless FareHarbor and WaiverForever Integration Through Zapier
In the realm of tour and activity services, ensuring a smooth and efficient booking process while managing liability through waivers is paramount. Recognizing this, WaiverForever has taken a significant step forward by enabling integration with FareHarbor via Zapier. This integration marks a pivotal moment as WaiverForever becomes the first waiver solution to leverage Zapier’s capabilities, providing a seamless bridge between booking services and waiver management.
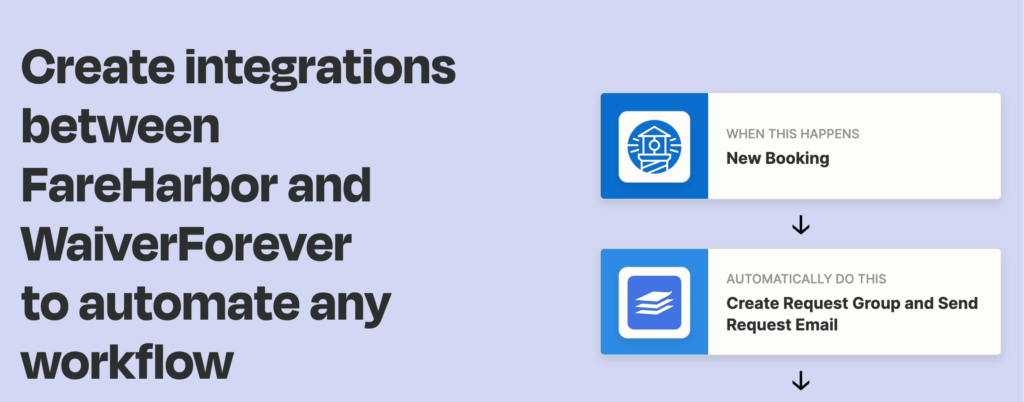
For our shared customers, this integration means a streamlined process where a customer’s booking in FareHarbor triggers an automatic creation of a request group in WaiverForever, followed by an email prompt for the customer to sign the waiver. Here’s a simplified guide on how to integrate FareHarbor with WaiverForever using Zapier, enhancing your customer’s experience and ensuring your operations run smoothly.
Initial Steps: Get Ready with Zapier
Before diving into the integration, ensure you have an active account on Zapier. Zapier will serve as the conduit for data between FareHarbor and WaiverForever. If you haven’t already, create a free account on Zapier’s website.
Crafting Your Automated Workflow with Zap
- Log into Zapier and select “Make a Zap.” This feature enables you to create an automated workflow, dubbed a “Zap.”
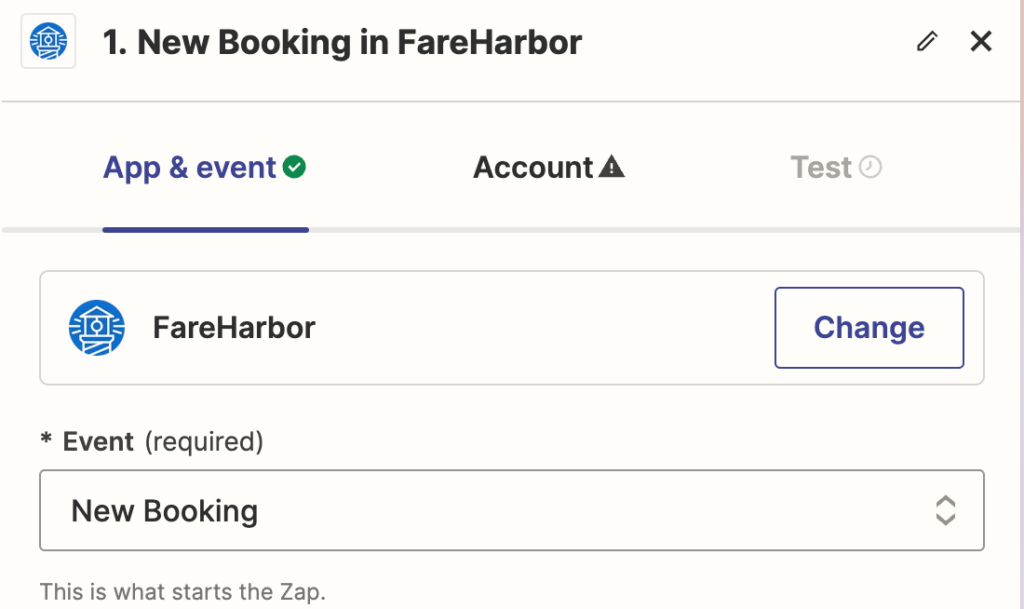
- Choose FareHarbor as your trigger app. This step involves selecting the specific event in FareHarbor—such as a new booking—that will initiate the automation.
- Connect to FareHarbor by entering your API credentials. Zapier offers a straightforward guide to locate these within your FareHarbor dashboard.
- Specify the trigger details from FareHarbor to ensure accurate data triggering for your automation.
Automating Actions with WaiverForever
After setting up the trigger with FareHarbor, it’s time to automate the action on WaiverForever’s end.
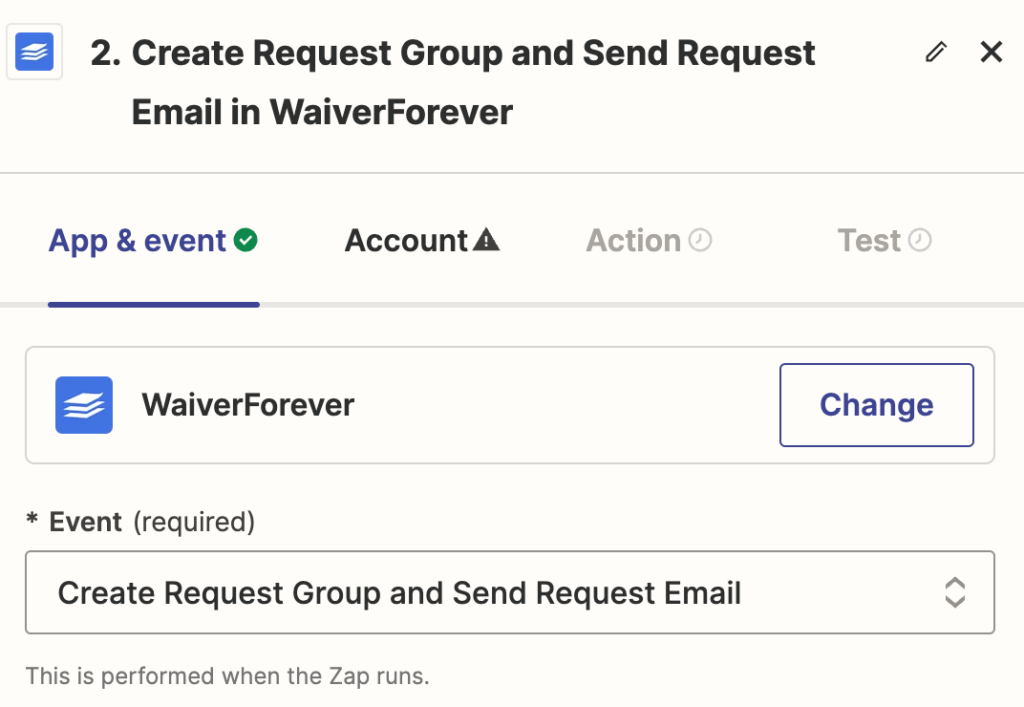
- Select WaiverForever as your action app. Look for WaiverForever in Zapier’s app directory and choose it as the destination for your data.
- Determine the action event, such as automatically creating a request group and sending out waiver signing requests via email whenever a booking occurs in FareHarbor.
- Authorize and connect your WaiverForever account, following Zapier’s prompts to ensure a secure connection.
- Configure the action details to match FareHarbor’s booking information with WaiverForever’s requirements, enabling automatic waiver request emails.
Testing and Implementation
- Test your Zap thoroughly using Zapier’s built-in testing tools. This ensures that the data flow between FareHarbor and WaiverForever operates as intended.
- Activate your Zap once testing is complete. Your automation will now run in the background, sending waiver requests automatically upon FareHarbor bookings.
Monitoring Your Success
Keep an eye on your Zap’s performance through Zapier’s monitoring tools. Regular checks and adjustments are vital to ensuring that the integration continues to meet your operational needs efficiently.
Elevating Your Business
This integration not only simplifies operations but also enhances the customer experience, providing a seamless transition from booking to waiver signing. By following this guide, you can effortlessly integrate FareHarbor with WaiverForever through Zapier, positioning your business at the forefront of operational efficiency and customer satisfaction. Embrace this integration to focus more on delivering exceptional services while the automation takes care of the paperwork.